Subcutaneous Fluid Therapy: Giving Your Cat Fluids at Home
Cats are living longer these days. As a result, more senior cat problems are being diagnosed and managed. Common geriatric cat illnesses include chronic kidney failure, hyperthyroidism, and cancer. Your veterinarian may prescribe home fluid therapy as a component of a larger treatment plan for one of these illnesses.
Why Would You Give Subcutaneous Fluids to Your Cat?
Dehydration leads to a decrease in the body's ability to perform basic functions and also causes cats to feel lethargic. During many chronic disease processes, especially chronic kidney disease, cats need more fluids than they can take in orally. In order to prevent these cats from being chronically dehydrated, it is common for veterinarians to suggest that people learn to administer subcutaneous fluid therapy to their cats at home.
What Is Subcutaneous Fluid Therapy?
Cats have extra space between their skin and the underlying tissues, and this is a great place to deposit fluids. Once the liquid has been injected into this space, the cat's body absorbs and uses it over the next few hours. Subcutaneous fluid therapy at home can add good quality and quantity to the time that elderly cats with chronic illnesses have with their families.
How Do You Give Subcutaneous Fluids to Your Cat at Home?
Before you begin administering subcutaneous fluids to your cat at home, the team at your veterinary clinic will teach you how to do it. Make sure that you understand all of the steps, and ask any questions that you might have. This article can serve as a reminder of the basic steps once you are performing the procedure on your own.
First, Gather Your Supplies
Collect everything that you will need when giving your cat his fluids. If you have everything within reach, it will go more smoothly. Here is what you will need:
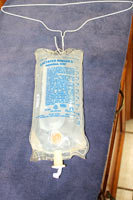
- Bag of fluids (you will not use an entire bag every time, so you may be opening a new bag or using one that is already set up from a previous session)
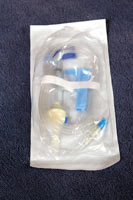
- Administration set
- New needle (unless you placed one on the set at the end of the last session)
- Wire hanger
- A place to suspend the hanger and fluids
- A nice cozy spot for your cat to relax, within reach of where the fluids will hang
- A comfortable spot for you to sit or stand next to your cat
- Cat treats
Next, Prepare Your Fluids
If you are using a brand new bag of fluids for the session, you will need to open the bag it comes in and attach the administration set. Your cat doesn't need to be present for this part and may get restless if you try and make him sit through it.
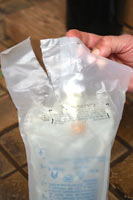
- Open and remove the outer plastic bag that the fluids come in.
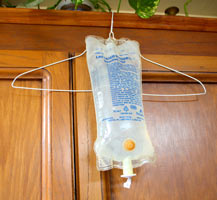
- There is a built-in spot from which to hang the fluids at the top of the bag. Hang the bag of fluids from something above your head. A wire hanger works well for this. Choose a spot that is close to where you will be administering the fluids, and make sure that the line will comfortably reach your cat, with some extra slack in the line in case your kitty moves.
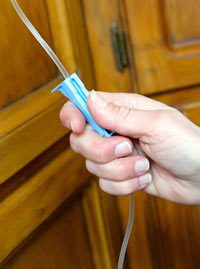
- Open an administration set. An administration set consists of the connections and fluid line that you will need in order to get the fluids from the bag into your cat. You should use a new administration set every time you open a new bag of fluids. Both ends of an unused administration set are capped to maintain sterility.
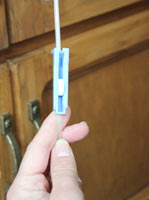
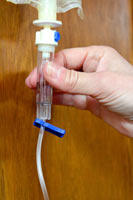
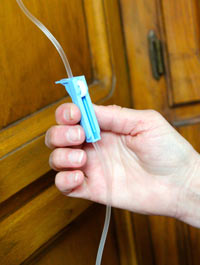
- Use the roller clamp present on the fluid line to close off the line somewhere in the center. This ensures that, when you attach the line to the bag, the fluids don't immediately start running out of the line onto the floor.
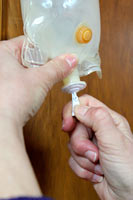
- Remove the plastic or rubber cap from the entry port at the bottom of the bag of fluids. Keep the entry point into the fluid bag clean by not touching it or allowing it to touch other things.
- Remove the cap from the end of the fluid line. Don't touch the end of the line or allow it to touch anything else.
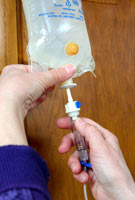
- Push the triangular end of the fluid line firmly into the bottom of the bag of fluids.
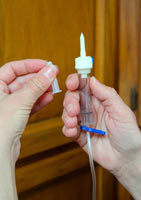
- Fill the fluid line's reservoir about halfway by pushing it together with your thumb and fingers, then letting go.
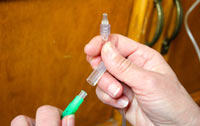
- Remove the cap at the needle-end of the fluid line. Be sure not to touch the end of the fluid line with your fingers or anything else.
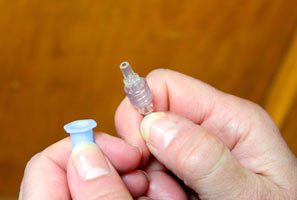
- Remove the plastic end at the base of a clean, new needle by twisting and pulling it off. Be sure not to touch the open base of the needle.
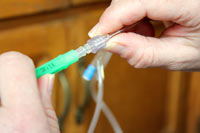
- Attach the needle to the free end of the fluid line by pushing firmly and twisting slightly.
- Hold the needle over a bowl or sink, without touching the needle to the bowl.
- Remove the cap of the needle.
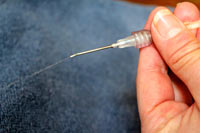
- Release the roller clamp in the center of the fluid line so that fluid runs down the line, through the needle, and into the bowl or sink for a few seconds. This will fill the line with fluid and remove air from it.
- Re-clamp the fluid line with one hand while being sure not to touch anything with the sterile needle in the other hand.
- Re-cap the needle.
Finally, Administer the Fluids
Now you are ready to give subcutaneous fluids to your cat.
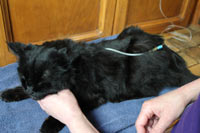
- Find your cat and make him comfortable on your lap or in a cat bed. It is easiest if he is resting upright on his sternum, allowing you access to his back and shoulders. This position makes it a bit harder for him to simply walk away from you. Give him a treat for sitting quietly. Speak softly to him, petting and reassuring him.
- The calmer you are about the procedure, the more likely your cat is to remain composed and take the event nonchalantly.
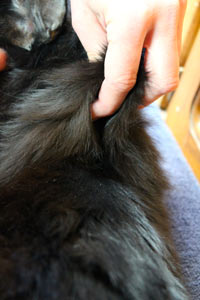
- Make a "tent" in your cat's skin. This can be done between the shoulder blades, over one shoulder, or over one hip. You should rotate between these spots every time you give your cat fluids in order to prevent one area of skin from becoming sore.
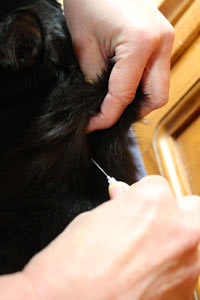
- With your other hand, remove the cap from the needle, then push the needle into the tent you've created, at a 20- to 40-degree angle.
- You will feel a popping sensation when the needle has gone through the skin and is sitting where you want it to, in the subcutaneous space.
- You can now release the tent, but continue steadying the needle so it doesn't slip out.
- Un-clamp the fluid line, and allow the desired amount of fluid to flow under your cat's skin.
- Pet your cat, praise him, and encourage him to be still while the fluids are running.
- Re-clamp the fluid line once the proper amount of fluids has been used.
- Remove the needle, lightly pinching together the area of the skin that you removed it from for ten to fifteen seconds.
- Praise your kitty calmly and quietly; petting him and giving treats if he can have them.
- Remove and properly dispose of the used, capped needle in a proper sharps container.
- Cap the end of the fluid line with the plastic cap that it came with. If you've lost the cap, you can place a new, capped needle on the end of the line so it is ready to be used at the next session.
- Mark the level of fluid currently in the bag of fluids (this is because the fluid level will look different when it is hanging or held differently). This way you can easily calculate how much fluid to give at the next session.
- If you feel or see fluid accumulating in your cat's fur, you may have gone through two sections of skin, resulting in the fluids being deposited on top of your cat's body instead of subcutaneously. When this happens, re-clamp the fluids, cap the needle, place a new needle on the fluid line, and try again. If this is happening to you often, try making a shorter tent and angling your needle a bit lower (20 to 40 degrees works best).
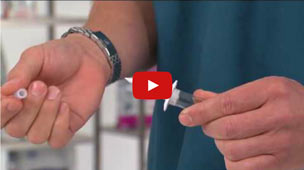
Here are some helpful videos for giving subcutaneous fluids to your cat at home:
You May Also Like These Articles:
Foods Toxic to Cats - Slideshow
Dehydration in Cats: How Can You Tell If a Cat Is Dehydrated?
How To Know When Your Cat Is Sick
Alternative and Holistic Veterinary Medicine for Cats
Pet Insurance: Peace of Mind for Your Cat\'s Health
Notice: Ask-a-Vet is an affiliated service for those who wish to speak with a veterinary professional about their pet's specific condition. Initially, a bot will ask questions to determine the general nature of your concern. Then, you will be transferred to a human. There is a charge for the service if you choose to connect to a veterinarian. Ask-a-Vet is not manned by the staff or owners of CatHealth.com, and the advice given should not delay or replace a visit to your veterinarian.


